Appearance
How to Edit CMS Content
Step-by-step guide to creating and editing CMS entries.
Creating a New Entry
Step 1: Open the CMS Panel
In the Framer editor, go to the left sidebar and click the CMS icon (or find the CMS panel tab).

Step 2: Select Your Collection
Choose the collection you want to add to:
- Pricing
- Cases
- Careers
- Blog
- Blog Categories
- Blog Authors
- Legal

Step 3: Click "New Item"
Look for a + New Item button. Click it to create a new entry.

Step 4: Fill in the Fields
Depending on the collection, fill in the required fields:
- Text fields — Type your content directly
- Image fields — Click to upload an image
- Rich text — Use formatting, headings, links
- References — Select from another collection (e.g., select an Author for a Blog post)
- Enums — Choose from dropdown options
- Booleans — Toggle on/off
Step 6: Publish Your Site
Go to the top-right of Framer and click Publish. Your new CMS entry is now live.
Duplicating an Entry (Quick Copy)
Instead of creating from scratch, you can duplicate an existing entry to save time — especially useful when items have similar fields:
- Open CMS panel → select collection
- Right-click the item you want to copy
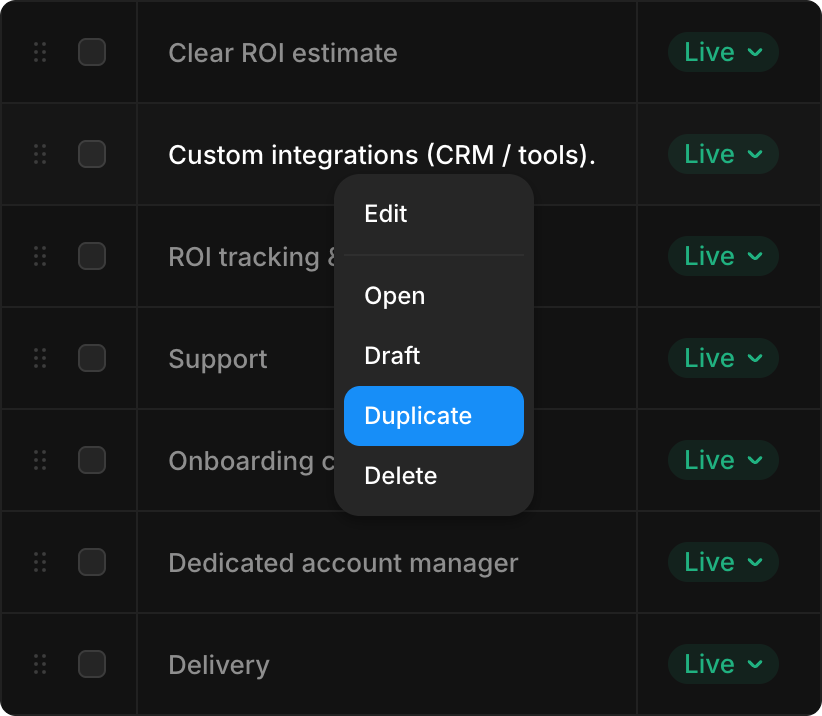
- Select Duplicate from the menu
- A new item is created with all the same fields filled in
- Edit the fields that need to be different (title, content, etc.)
- Click Save
- Publish to make it live
When to use Duplicate:
- Creating similar blog posts with the same structure
- Adding multiple job openings with similar descriptions
- Creating case studies with consistent formatting
- Adding pricing features with similar configurations
Editing an Existing Entry
- Step 1: Open the CMS Panel
- Step 2: Find the Collection. Select the collection containing the item you want to edit.
- Step 3: Click the Item. All items in the collection are listed. Click the item you want to edit.
- Step 4: Make Changes. Edit any field. Your changes are saved automatically.
- Step 5: Publish. Click Publish (top-right) to make the changes live.
Deleting an Entry
- Open CMS panel → select collection
- Right-click the item → Delete
- Confirm the deletion
- Publish to apply the change
WARNING
Deleting a CMS entry removes its auto-generated page (e.g., deleting a blog post removes /blog/:slug).
Reordering Entries
Most collections let you drag items to reorder:
- Open CMS panel → collection
- Click and drag the item to a new position
- Publish to save the order
Slug Auto-Generation
When you create an entry with a Title field, the Slug (URL path) is auto-generated:
- "My Amazing Blog Post" →
my-amazing-blog-post - "Case Study 2024" →
case-study-2024
You can manually edit the slug if needed.
Publishing Changes
TIP
CMS changes don't go live until you Publish your site. Click Publish (top-right in Framer) after making changes.
Bulk Operations
Select Multiple Items
To manage multiple CMS entries at once:
- Open CMS panel → select collection
- Check the checkbox next to each item you want to select, or click Select All to select everything in the collection
- A toolbar appears with options:
- Draft — Hide items from your site without deleting them
- Undraft — Publish hidden items back to your site
- Delete — Permanently delete selected items
- Cancel — Close the selection toolbar
Draft Status
Any CMS entry can be placed in Draft status:
- Draft items are hidden from your live website
- Draft items are NOT deleted — they remain in your CMS for later use
- Use Draft to temporarily hide content (unpublished announcements, upcoming features, removed testimonials, etc.)
- Draft and un-draft items individually by right-clicking, or select multiple items and use the bulk toolbar
Large Content Imports
For large imports of content (many blog posts at once):
- Open the Plugins panel in Framer (top toolbar)
- Search for or browse CSV Import, Google Sheets, or other import plugins
- Install the plugin and follow its instructions to import your CMS data in bulk
Popular import plugins:
- CSV Import — Import content from spreadsheet files
- Google Sheets — Sync CMS entries directly from Google Sheets
- Notion — Pull content from your Notion database