Appearance
Editing Content
Learn how to edit text, images, and other content on your pages.
Updating Text
Method 1: Direct Canvas Editing
- Click any text element on the canvas (single-click to select)
- Double-click to enter edit mode
- Type to replace the content
- Click outside or press Escape to finish
Changes appear instantly on the canvas.
Method 2: Properties Panel
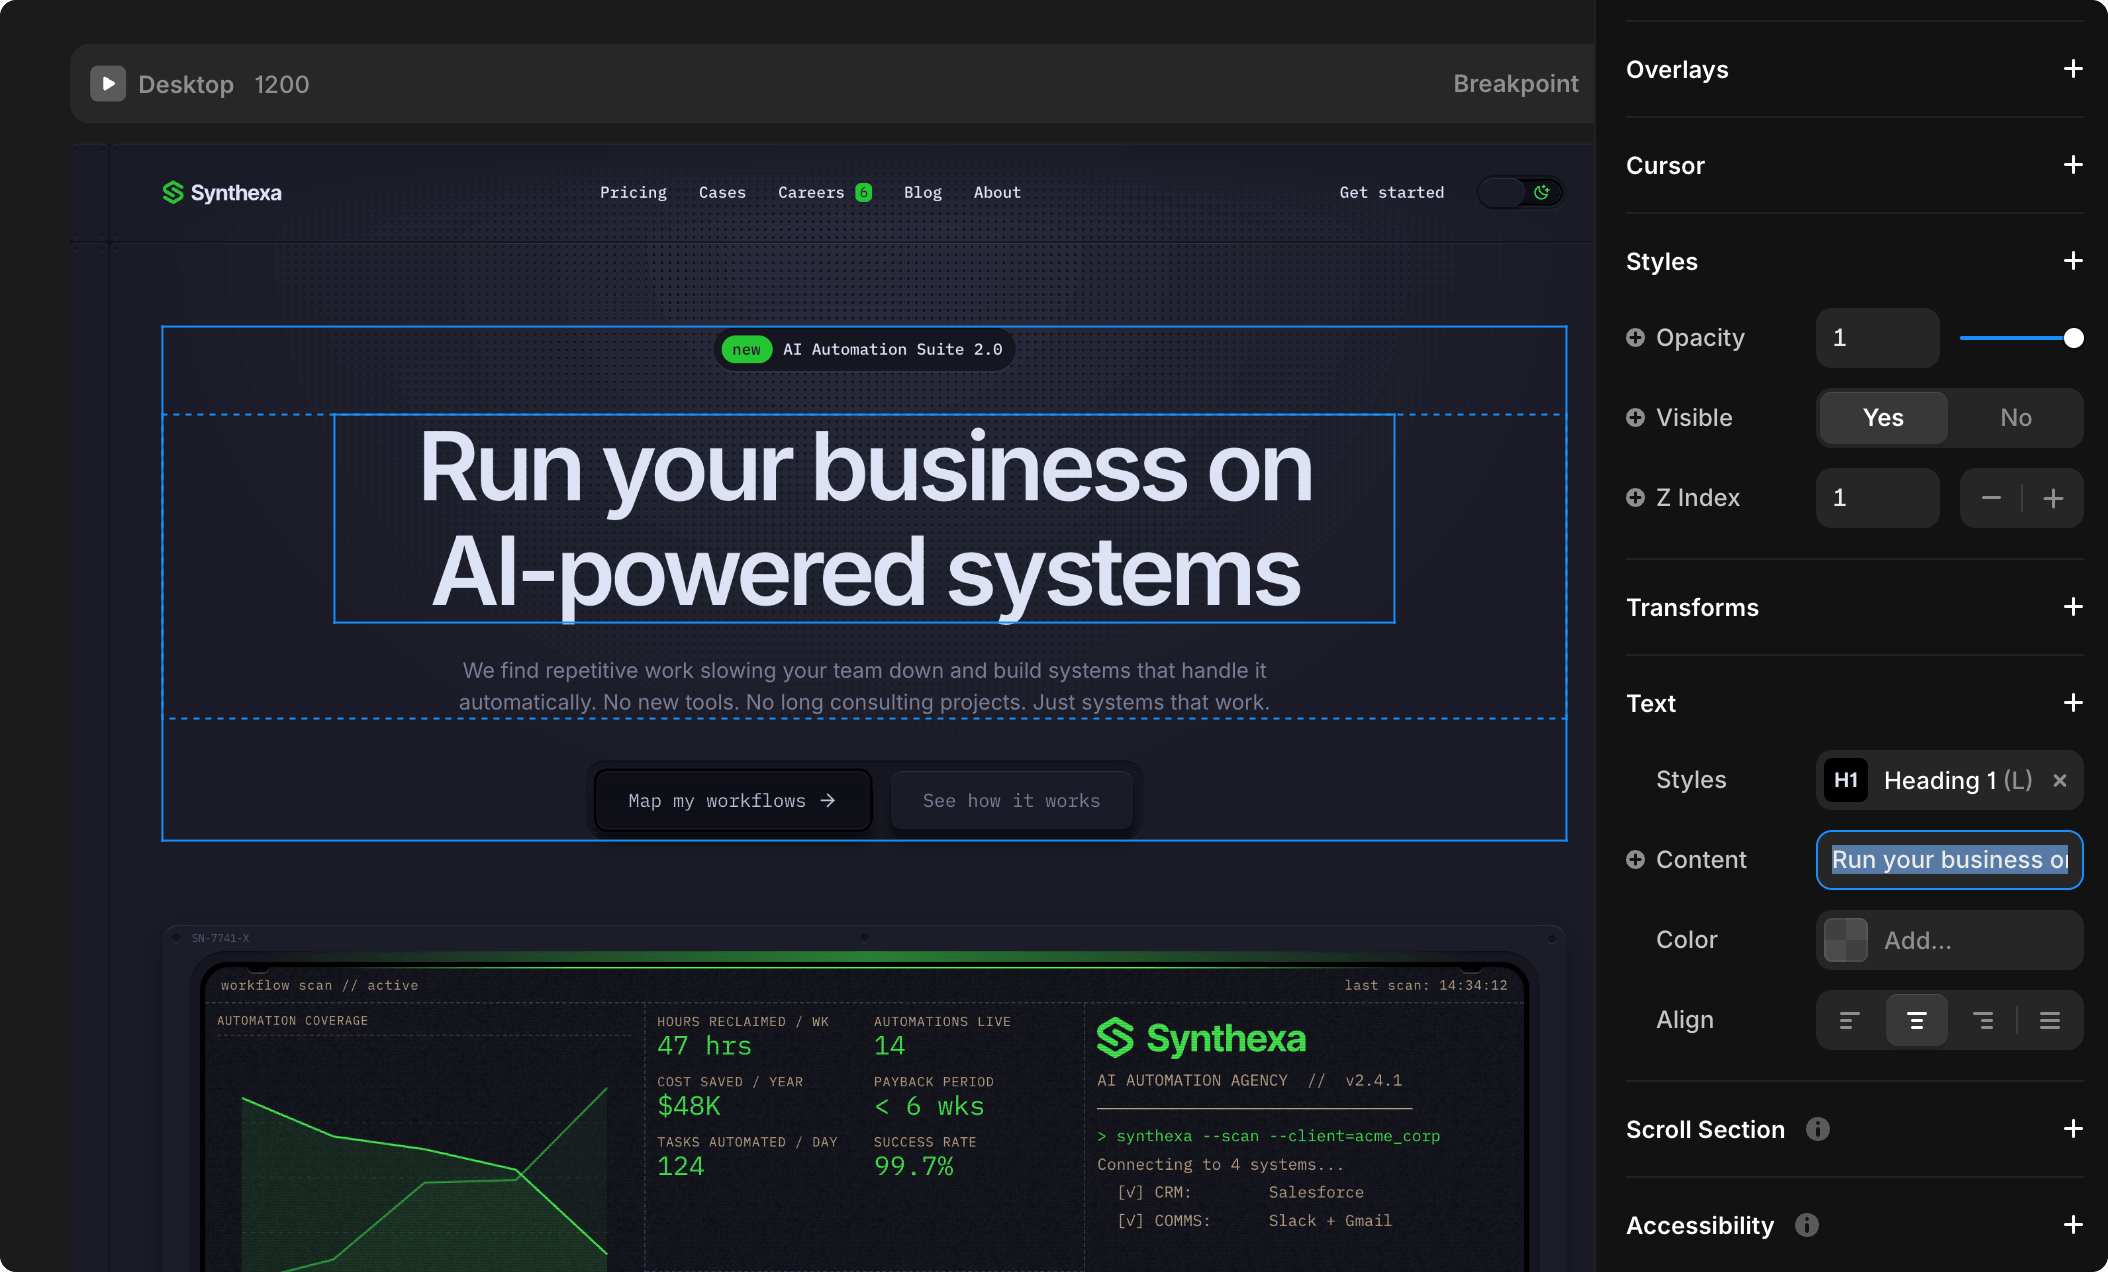
- Click the text element (single-click)
- Open the Properties panel (right sidebar)
- Look for the Content field
- Edit the text directly there
Changing Text Styles
All text in SYNTHEXA uses global Text Styles.
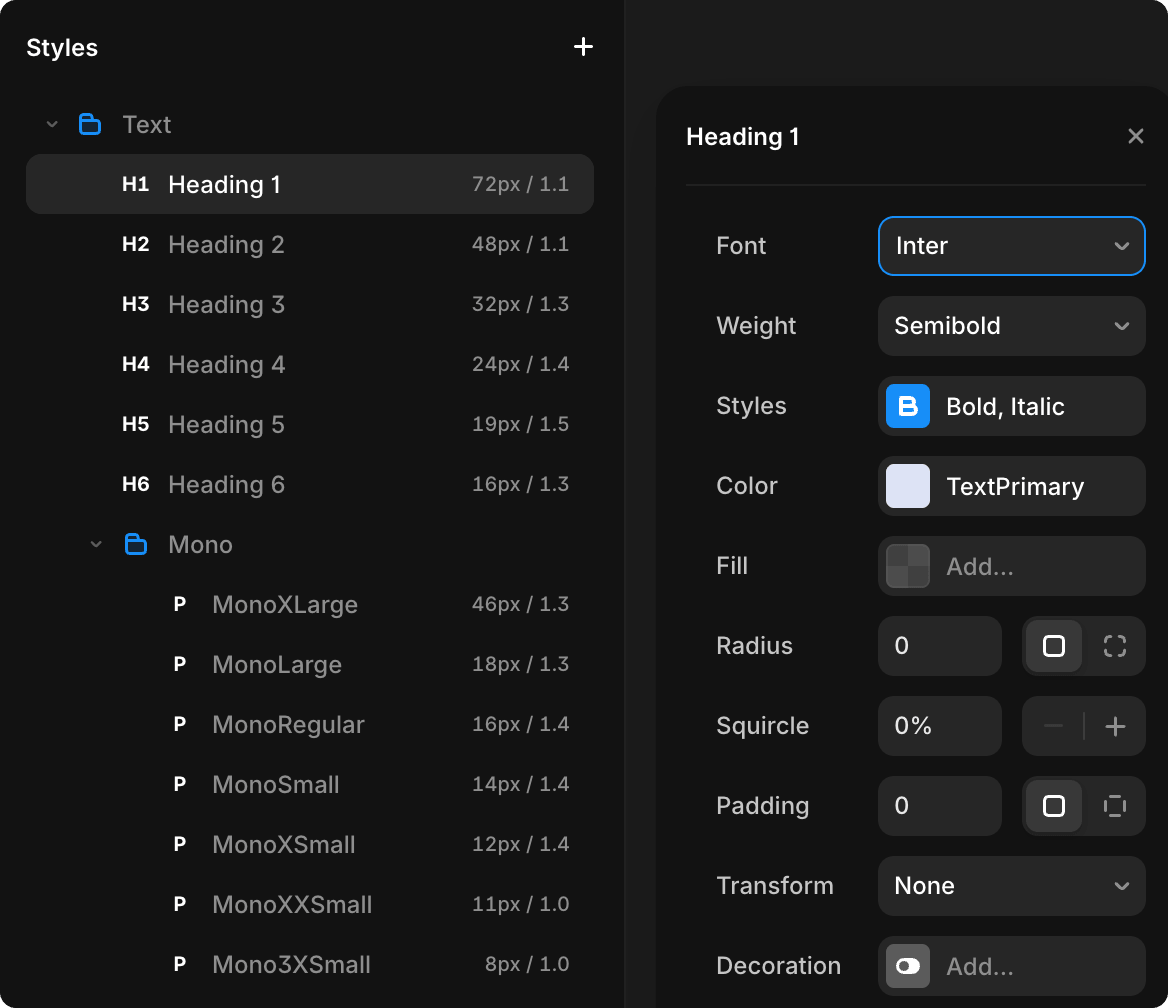
To update a style:
- Go to Assets → Text Styles
- Find the style (e.g.,
/Heading 1,/Body/BodyRegular) - Click to edit
- Change font, size, weight, color
- All elements using that style update instantly across the entire site
WARNING
Avoid changing individual element styles. Always edit the global Text Style instead — it keeps your site consistent.
Editing Specific Elements
Navigation & Footer
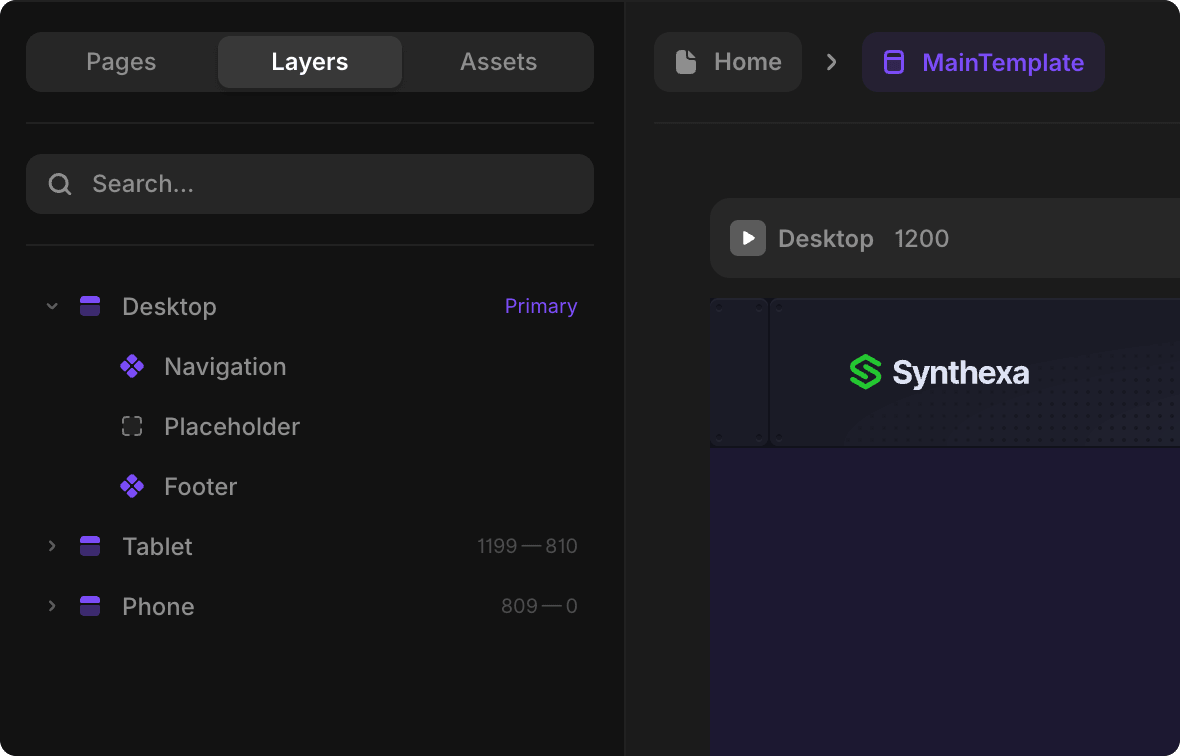
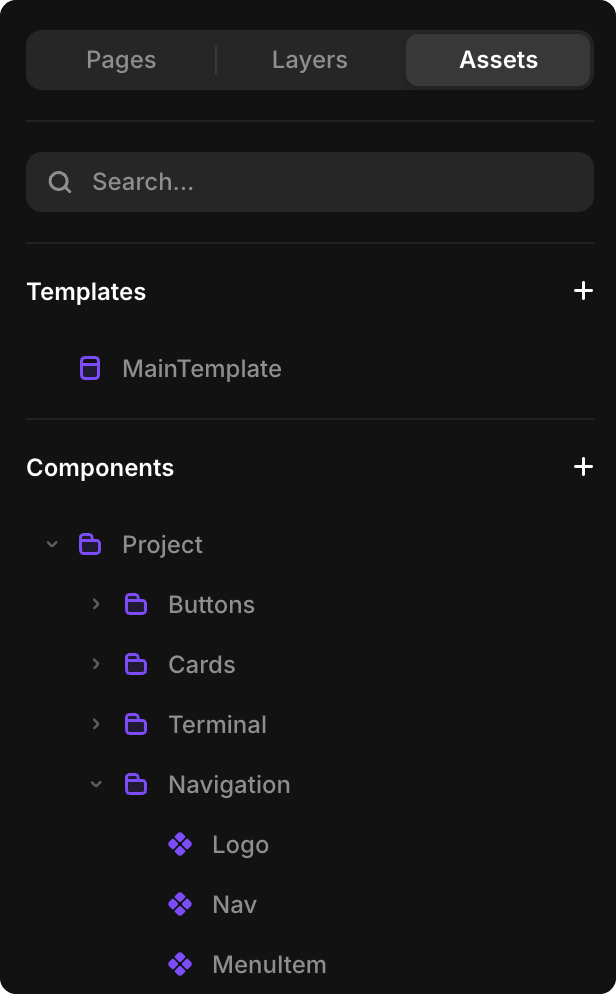
- Go to Assets → Templates → MainTemplates
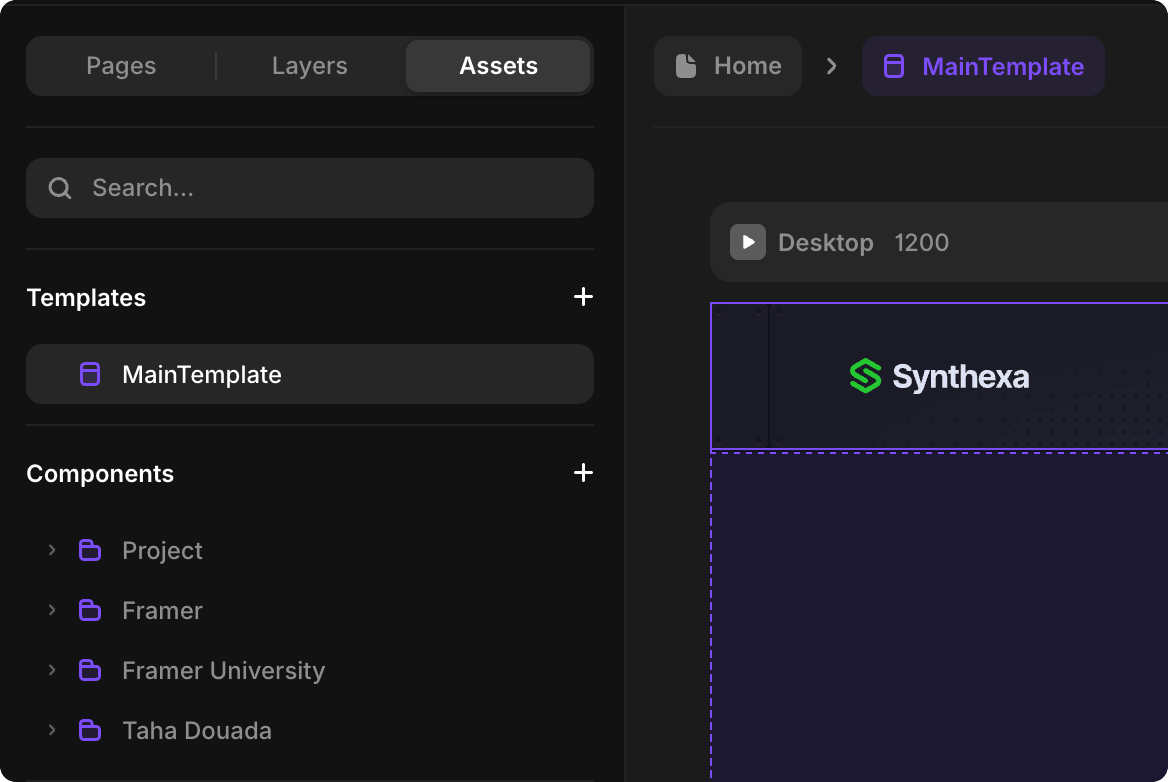
- In the Layers panel, you will see the Navigation and Footer components
To edit them, select the component in the layers and click Edit Component in the right Properties panel
- Alternatively, you can double-click the component directly on the canvas
To update the link:
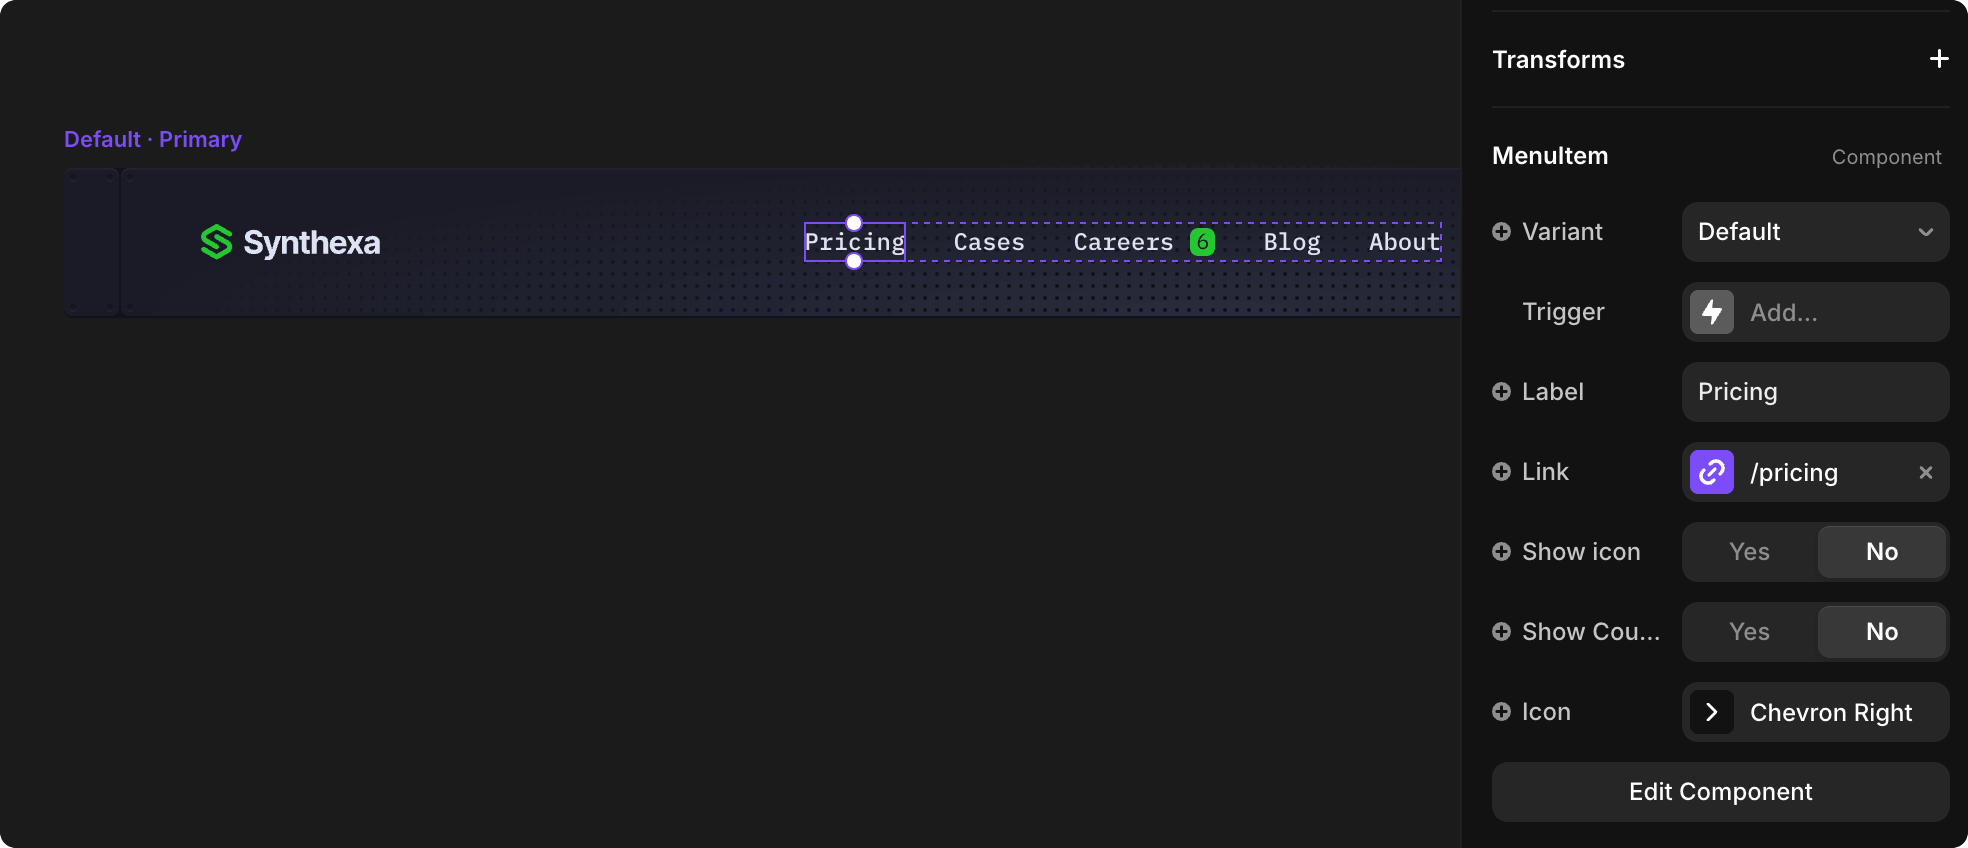
- Select the navigation item.
- Locate the Link field in the Properties panel.
- Choose the page you want the item to link to.
- To change the navigation label (text):
- Select the navigation item.
- In the Properties panel, find the Label field.
- Edit the text to change the menu item name.
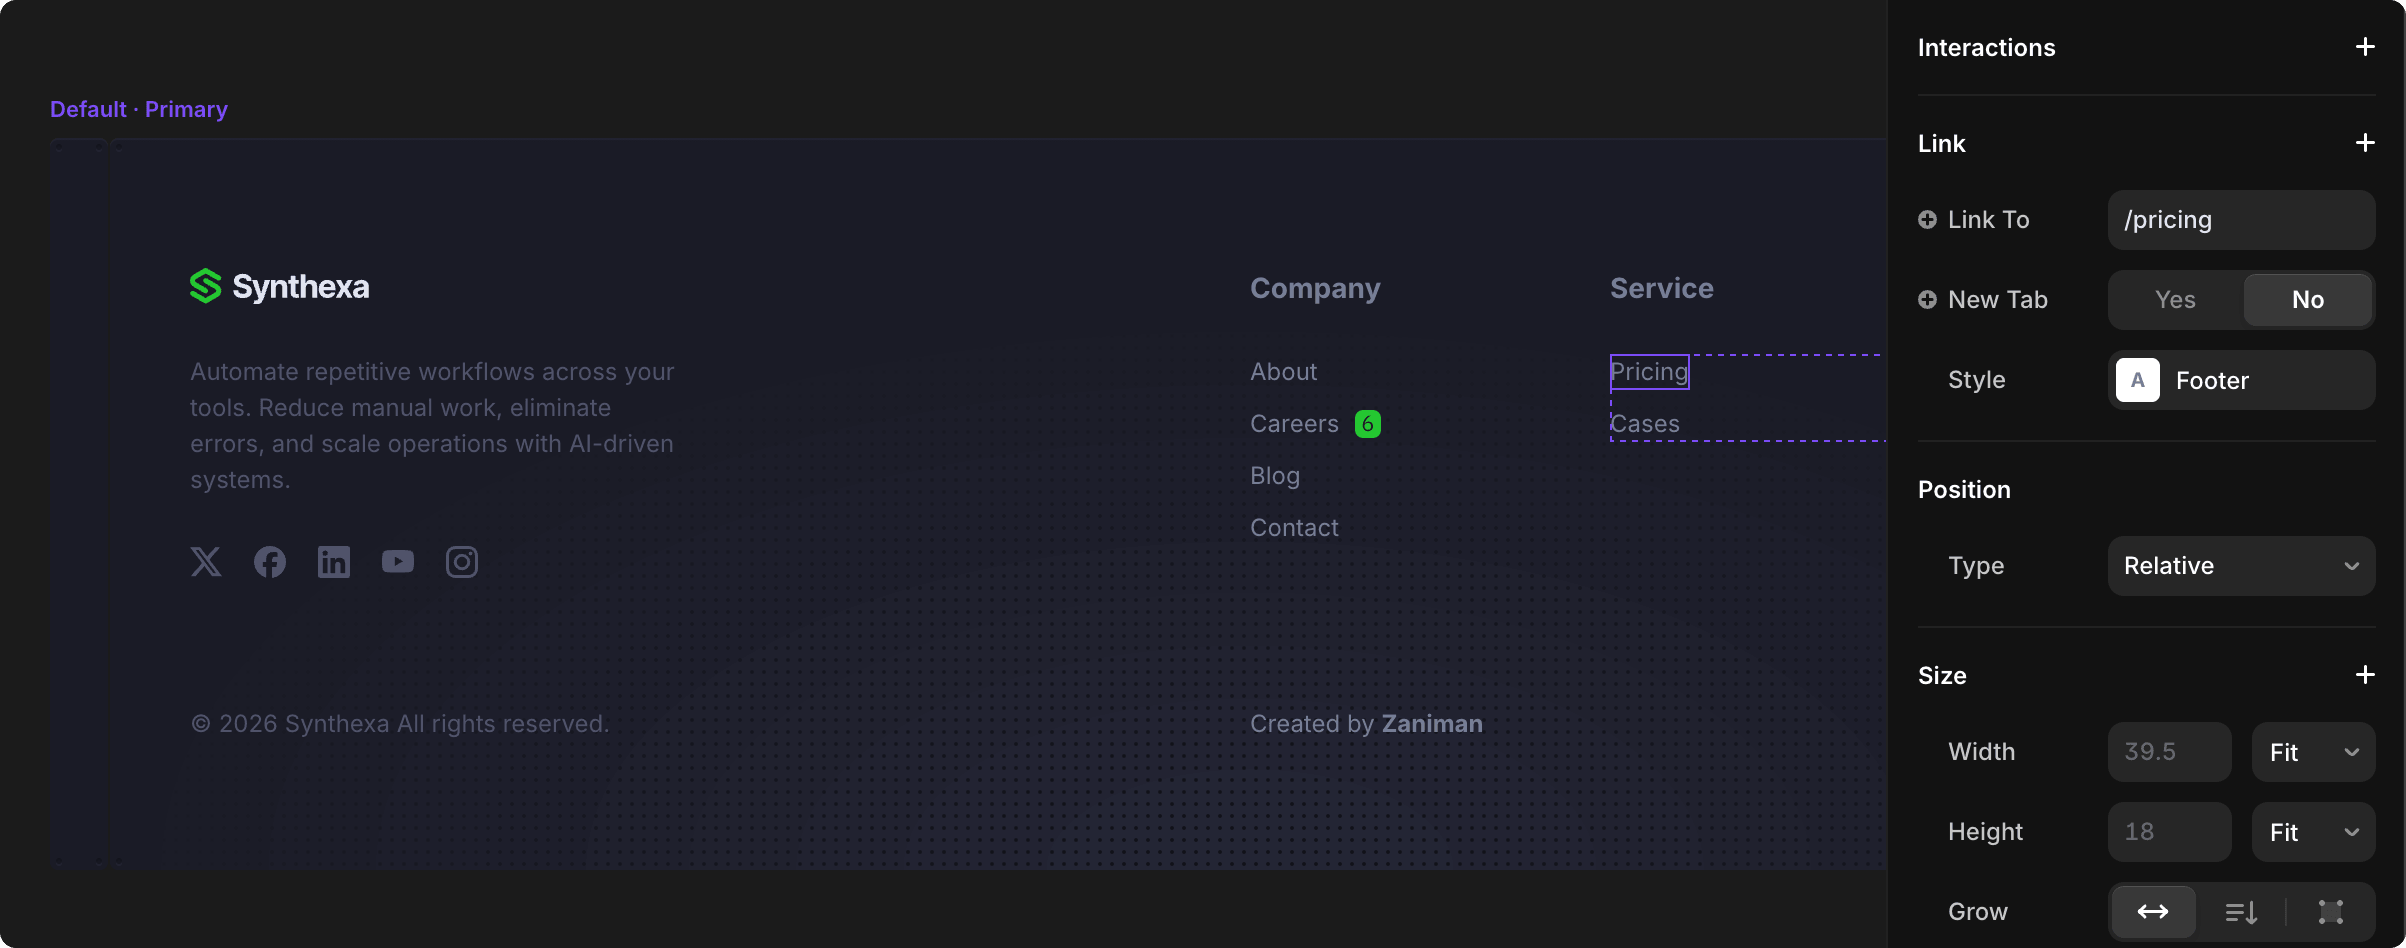
Footer links are text elements, not components. To edit them:
To change a footer link URL:
- Select the link text on the canvas
- Open the Properties panel (right sidebar)
- Locate the Link section at the top
- Change the Link To value to your desired URL
To change the link text (display name):
- Select the link text on the canvas
- In the Properties panel, scroll down to the Text section
- Find the Content field
- Edit the text to change what visitors see
Logo
To replace the SYNTHEXA logo with your own:
- In the left sidebar, click Assets → Components → Navigation → Logo
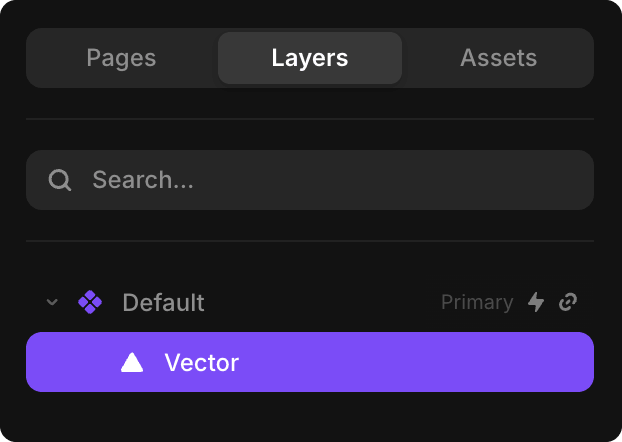
- Switch to the Layers tab in the left panel
- In the layers tree, find and select Default > Vector
- Open the Properties panel (right sidebar)
- Locate the Logo section (Vector Set name) and click Edit

- Inside the Vector Set, you can:
- Replace the existing Synthexa text/logo with your own SVG logo
- Or create a new vector (click +Add) and insert your custom SVG logo

Inserting your SVG logo onto the canvas:
- Method 1: Go to File → Upload Image and select your SVG file
- Method 2: Drag and drop your SVG file directly from your operating system onto the canvas
TIP
Logo best practices:
- Size — Keep your logo 20px in height to maintain layout consistency
- Theme colors — Assign color tokens so the logo color changes with themes:
- Use TextPrimary token for text elements
- Use BrandPrimary token for icon/symbol elements
- This ensures your logo adapts automatically to Light and Dark modes
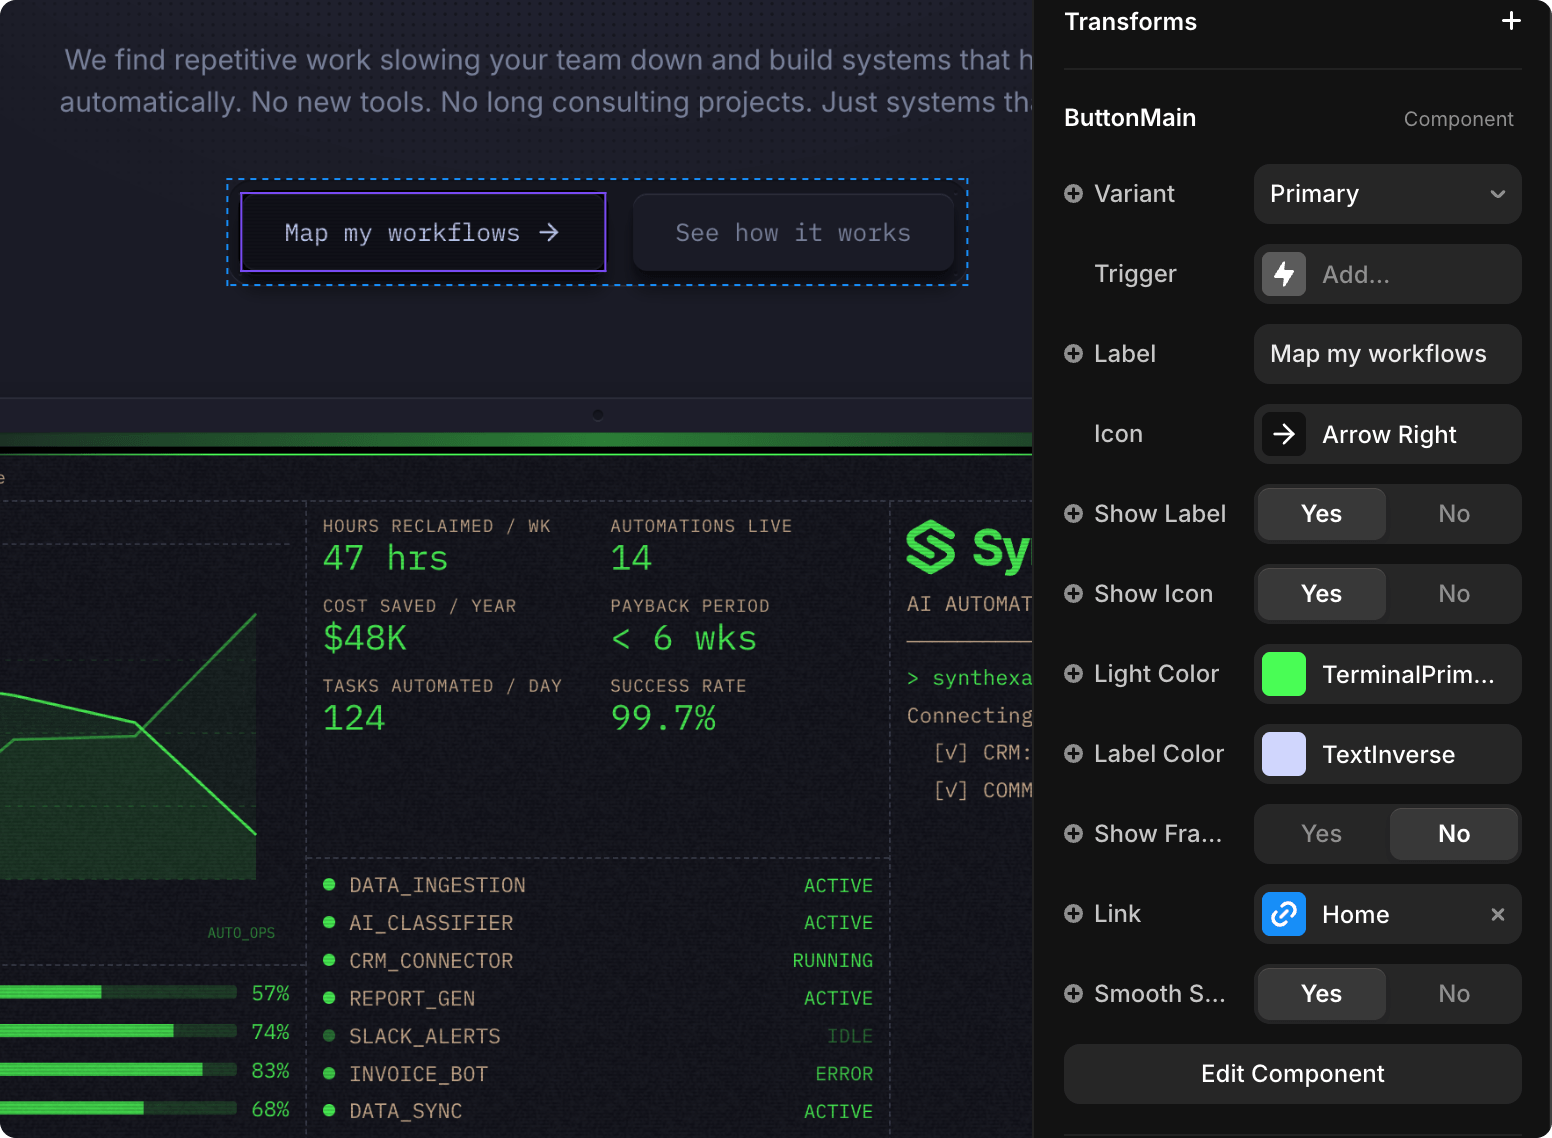
Hero Sections
- Edit headline and subheadline with double-click
- Adjust CTA buttons text and icons
- Click the button on the canvas to select it
- Open the Properties panel (right sidebar)
- Change button text — Find the Label field and edit the text
- Change button icon — Find the Icon field and select a different icon
- Change button variant — Find the Variant field to change the button style
- Toggle visibility — Use Show Label and Show Icon to hide/show elements
Blog/Cases Sections
- Don't edit these directly — use CMS collections instead
- Add blog posts and cases via the CMS panel
Using Component Properties
For components like TerminalDashboard, ROICalculator, etc., don't edit the internals. Instead:
- Click the component (single-click to select the whole component)
- Open Properties panel (right sidebar)
- Look for property controls (sliders, dropdowns, color pickers)
- Adjust the properties to customize the component
TIP
Editing component internals breaks them. Always use the property controls in the Properties panel.
Switching Themes (Dark & Light Mode)
SYNTHEXA includes Light and Dark color schemes that users can toggle on your live site. This allows visitors to choose their preferred viewing experience.
How Users Switch Themes
Your site visitors can toggle between Light and Dark modes using the theme toggle button in the navigation bar.

Simply click the toggle icon to switch between modes.
Customizing the Themes
To modify the Light and Dark color schemes:
- Go to Assets → Colors in Framer
- Find color token groups:
- Terminal — TerminalPrimary, TerminalSecondary, TerminalLines
- Background — BackgroundHighlight, BackgroundTop, BackgroundElevated, BackgroundSurface, BackgroundBase, BackgroundCanvas
- Brand, Text, Others — Additional tokens for your branding
- Click on any token to edit the Light and Dark color variants
- Your site updates automatically — both light and dark versions reflect the changes
TIP
Use color tokens strategically — keep dark mode readable with sufficient contrast, and ensure light mode isn't too harsh on the eyes.
Hiding the Theme Toggle Button
If you want to remove the theme toggle from the navigation bar and let the theme automatically follow the user's OS settings:
- Go to Assets panel (top left)
- Click on MainTemplate component
- Find and select the Navigation component
- In the right sidebar, locate Theme Switcher setting
- Set it to Off

The theme will now automatically switch based on the user's operating system preferences (Light or Dark mode).
INFO
When Theme Switcher is Off, visitors will see either Light or Dark theme based on their system settings. They won't have manual control to toggle themes.
Using Only One Theme
If you want your site to use only one color theme (e.g., always Dark mode):
- Go to Assets → Colors in Framer
- For each color token (TerminalPrimary, BackgroundBase, etc.), click to open it
- Set the Dark and Light variants to the same color:
- If you want Light mode only — copy your Light color values to the Dark slot
- If you want Dark mode only — copy your Dark color values to the Light slot
- Apply this to all tokens across Terminal, Background, Brand, Text, and Others groups
Now your site will look identical regardless of system settings or theme preference. All variants will use the colors you specified.